Hey everyone, welcome to our recipe page, if you’re looking for Sourdough bloomer recipe, look no further! We provide you only the perfect Sourdough bloomer recipe here. We also have wide variety of recipes to try.
Before you jump to Sourdough bloomer recipe, you may want to read this short interesting healthy tips about Foods That Make Your Mood Better.
Mostly, people have been taught to think that “comfort” foods are not good for the body and need to be avoided. If your comfort food is candy or junk food this is true. Otherwise, comfort foods could be very nourishing and good for you. Several foods really do elevate your mood when you eat them. If you are feeling a little bit down and need a happiness pick me up, try some of these.
Eggs, believe it or not, are wonderful for helping you battle depression. You need to make sure, however, that what you make includes the egg yolk. The yolk is the most essential part of the egg in terms of helping raise your mood. Eggs, the egg yolks especially, are loaded with B vitamins. B vitamins can genuinely help you elevate your mood. This is because the B vitamins help your neural transmitters–the parts of your brain that dictate your mood–work better. Consume an egg and feel a lot happier!
As you can see, you don’t need junk food or foods that are bad for you so you can feel better! Try a couple of of these hints instead.
We hope you got insight from reading it, now let’s go back to sourdough bloomer recipe. To cook sourdough bloomer you only need 5 ingredients and 10 steps. Here is how you cook that.
The ingredients needed to make Sourdough bloomer:
- Use of bread flour.
- Provide of kamut flour.
- Use of sourdough starter.
- Use of warm water.
- Get of water mixed with 10g salt.
Steps to make Sourdough bloomer:
- In a large bowl, mix together the bread and kamut flour, the warm water and the sourdough starter, then cover with a hot wet cloth and leave to rest for 30 mins at room temperature, to allow all the ingredients to bond.
- Add the salted water to the mixture and knead together. Adding the salt now will help tighten up the dough, allowing you to tuck the sides under to shape. Cover with a wet cloth and leave to rest for 30 mins at room temperature.
- Now stretch and fold your dough, to let that gluten work and create some structure. To do so, grab a "corner" of your dough and gently pull it outward, stretching and waving it, then fold it on its own. Repeat until the edges all around the dough have been pulled and folded. Cover with a wet cloth and leave to rest for 30 mins at room temperature.
- Repeat step 3 about 5-6 times, letting your dough rest for 30mins in between stretches. Then let it rest for at least 1-2 hours.
- Now you can shape: get your dough on a floured surface, and pull it into a square. Now fold the corners in, in a cross stitch manner. Then fold it 4 times on its own: pull the bottom 1 third up, then the top 1 third down, and the left and right sides 1 third in. Turn your dough upside down, and start sliding it on the surface in order to tighten and seal the bottom. Let it rest a few seconds, to allow the dough to completely seal underneath.
- Time for proofing: generously flour your proofing basket (or you can use a bowl lined with a dry, clean tea towel like I do) and tip your dough in it upside down. Cover and let it rest at room temperature for 1-2hours, then in the fridge overnight.
- Once the dough has risen, preheat your oven at 220°, and leave your casserole or dutch oven in it to get really hot. Once you reached your temperature, flour the casserole or dutch oven, or line with a baking sheet, the tip the dough into it, and score the top of with a sharp knife. Cover with a lid and bake for 20 minutes. Leave a tray full of water in the oven during baking time, to allow extra moisture in.
- After 20 minutes, remove the lid and bake for another 20 minutes.
- Once the bread has cooked for 40 minutes, take it out of the oven and place on a cooling rack.
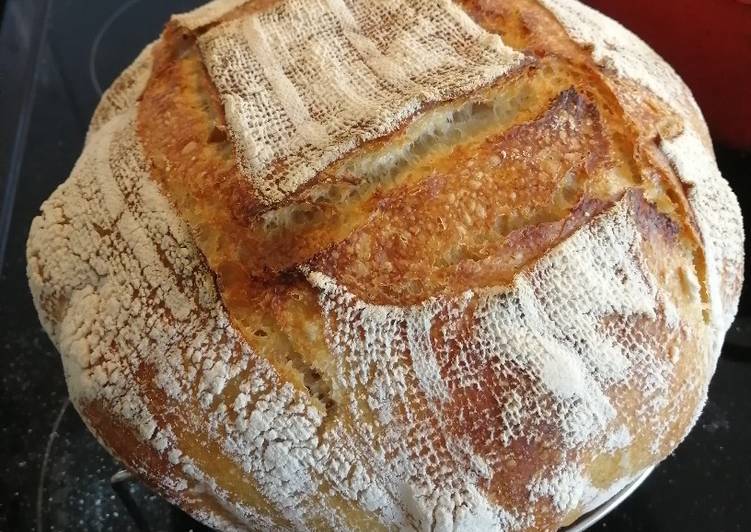
- Once it's completely cold, slice it and go ahead enjoying it on its own or with some delicious butter 😊.
Making delicious sourdough bread will turn you into your family's hero so grab these sourdough tips and tricks to help. Are there any particular types of loaf shapes that work best for sourdough? I most commonly see it in a Boule and second most in a Batard. I have used both of those and I am tempted to try a loaf pan. Learn to make Sourdough & discover why sourdough is the healthiest bread.
If you find this Sourdough bloomer recipe valuable please share it to your good friends or family, thank you and good luck.
